Using MIDI Memories with Ableton Live
MIDI Memories is a MIDI effect. This means the setup is a bit different to normal audio effects plugins.
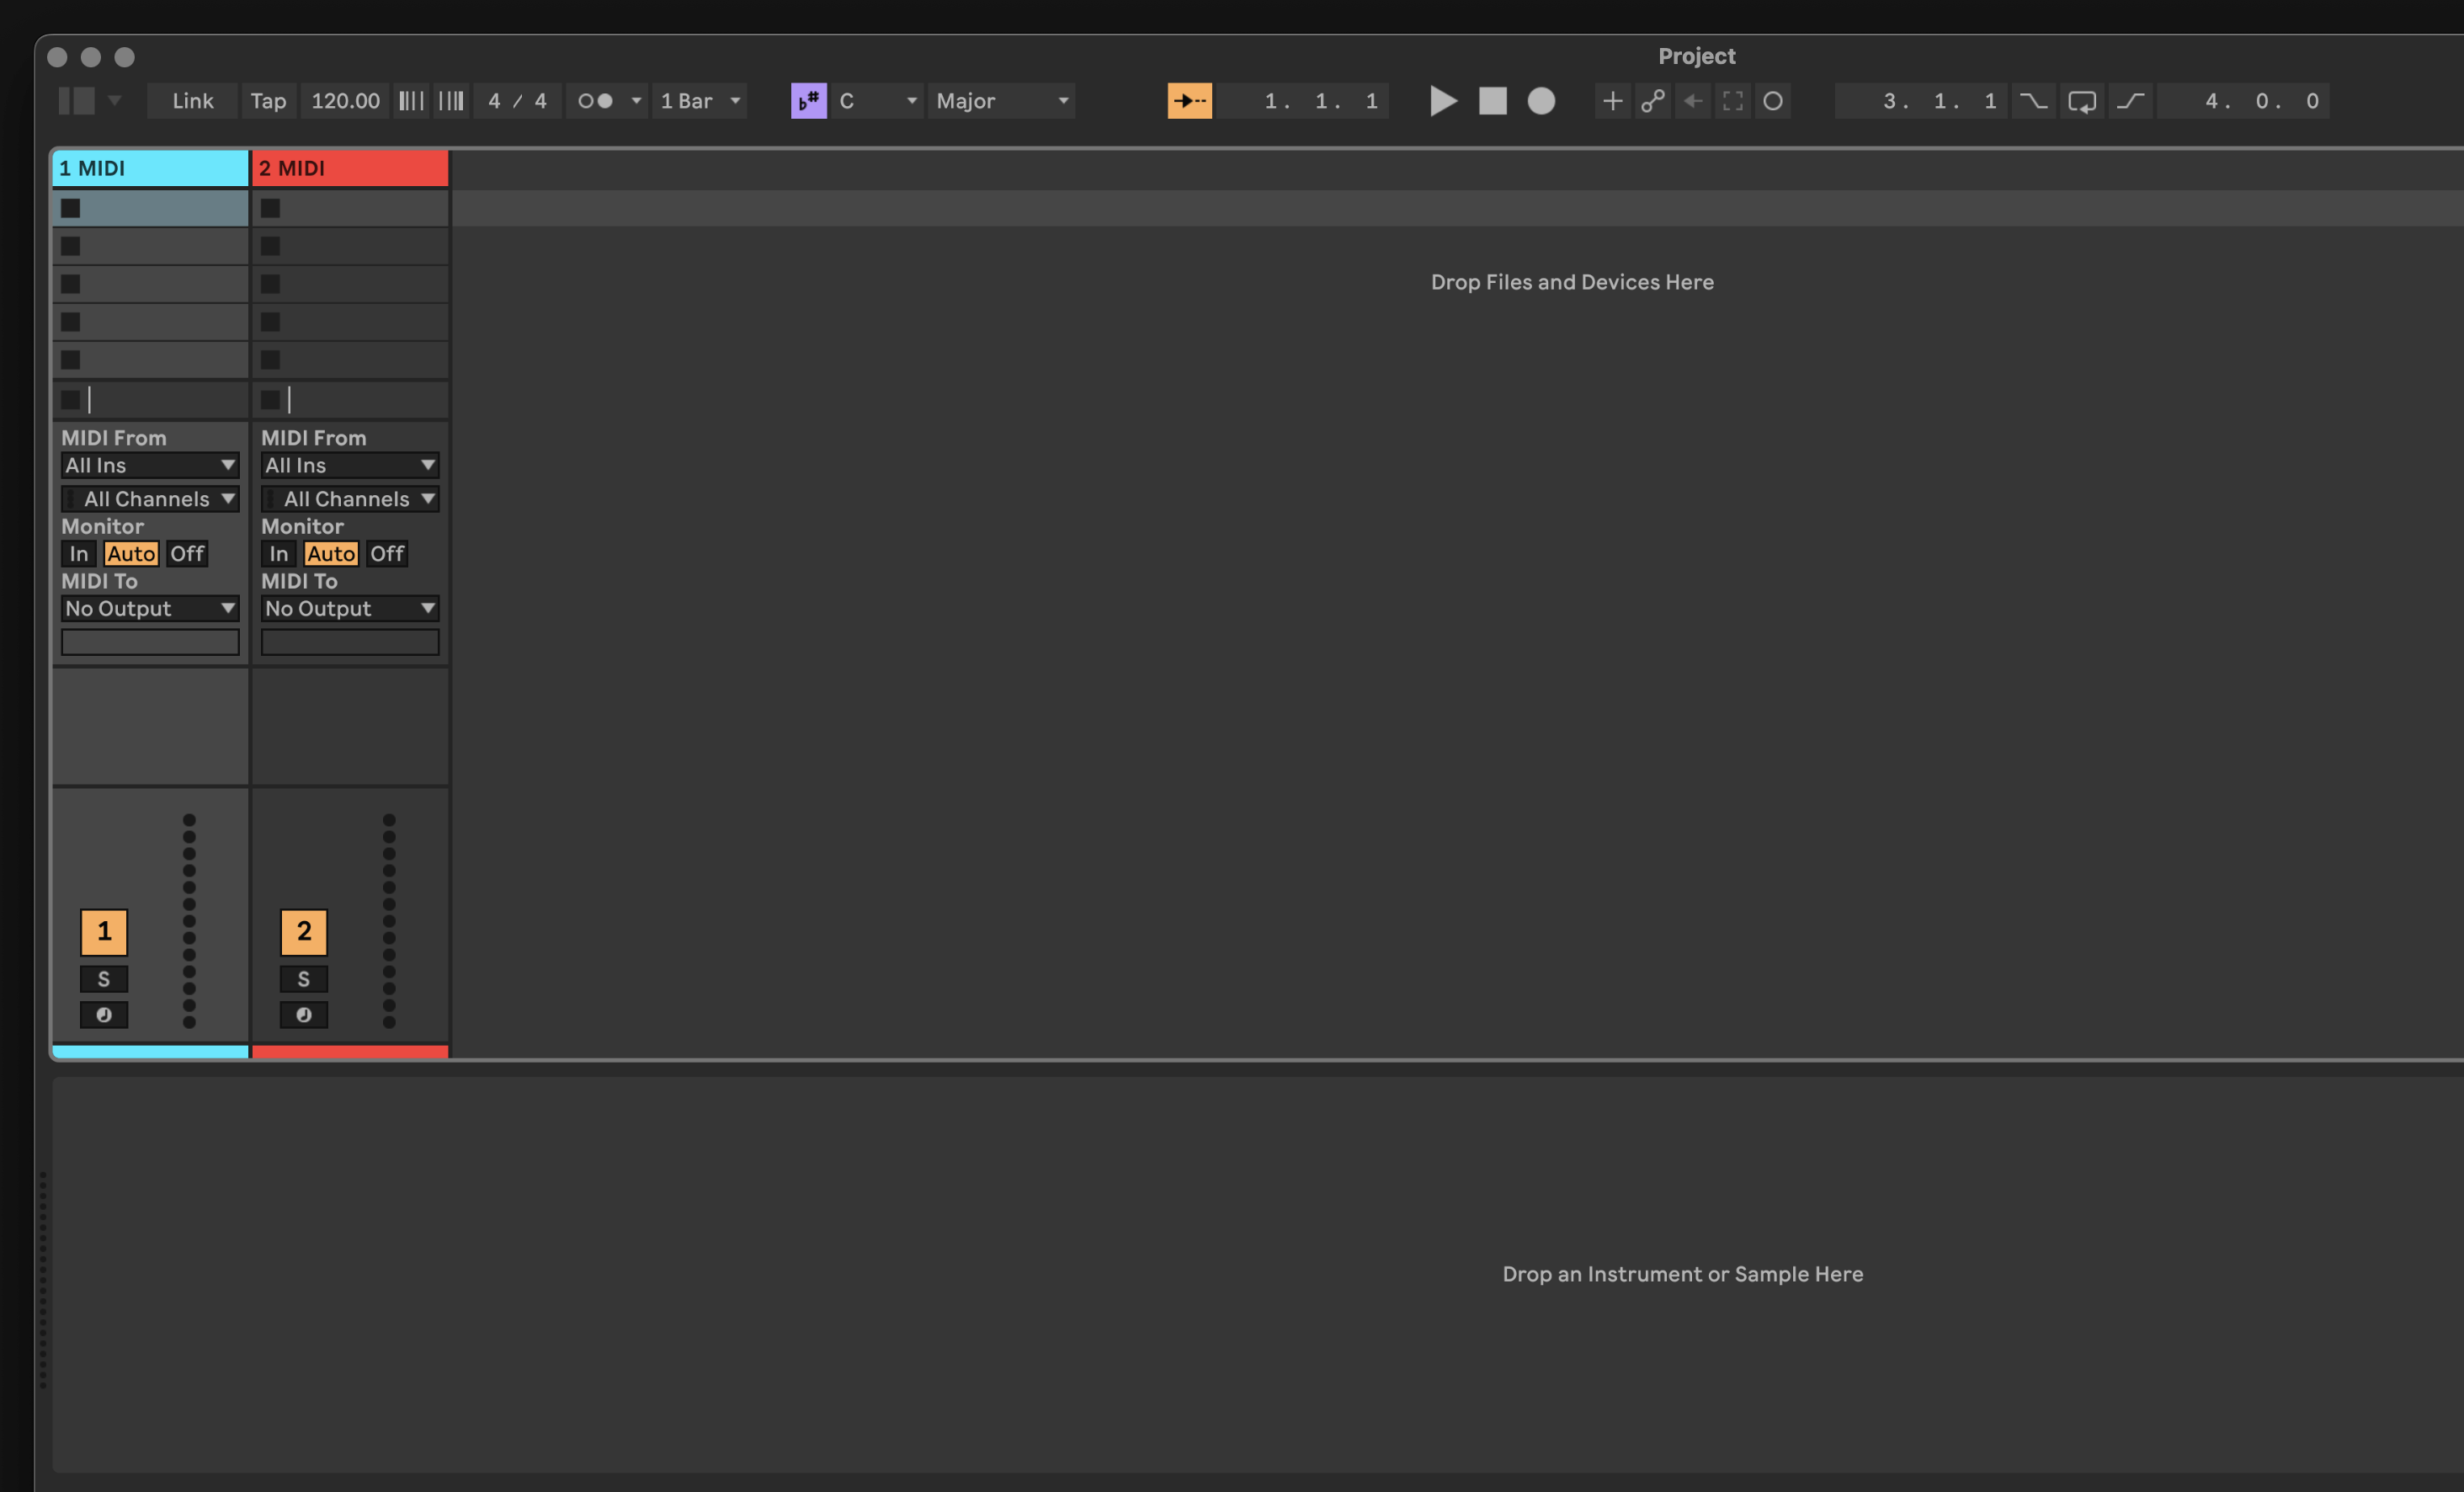
1. Create two MIDI tracks #
Start by creating two MIDI tracks. One will be used for MIDI Memories, and the other will be used for your instrument.
2. Add MIDI Memories #
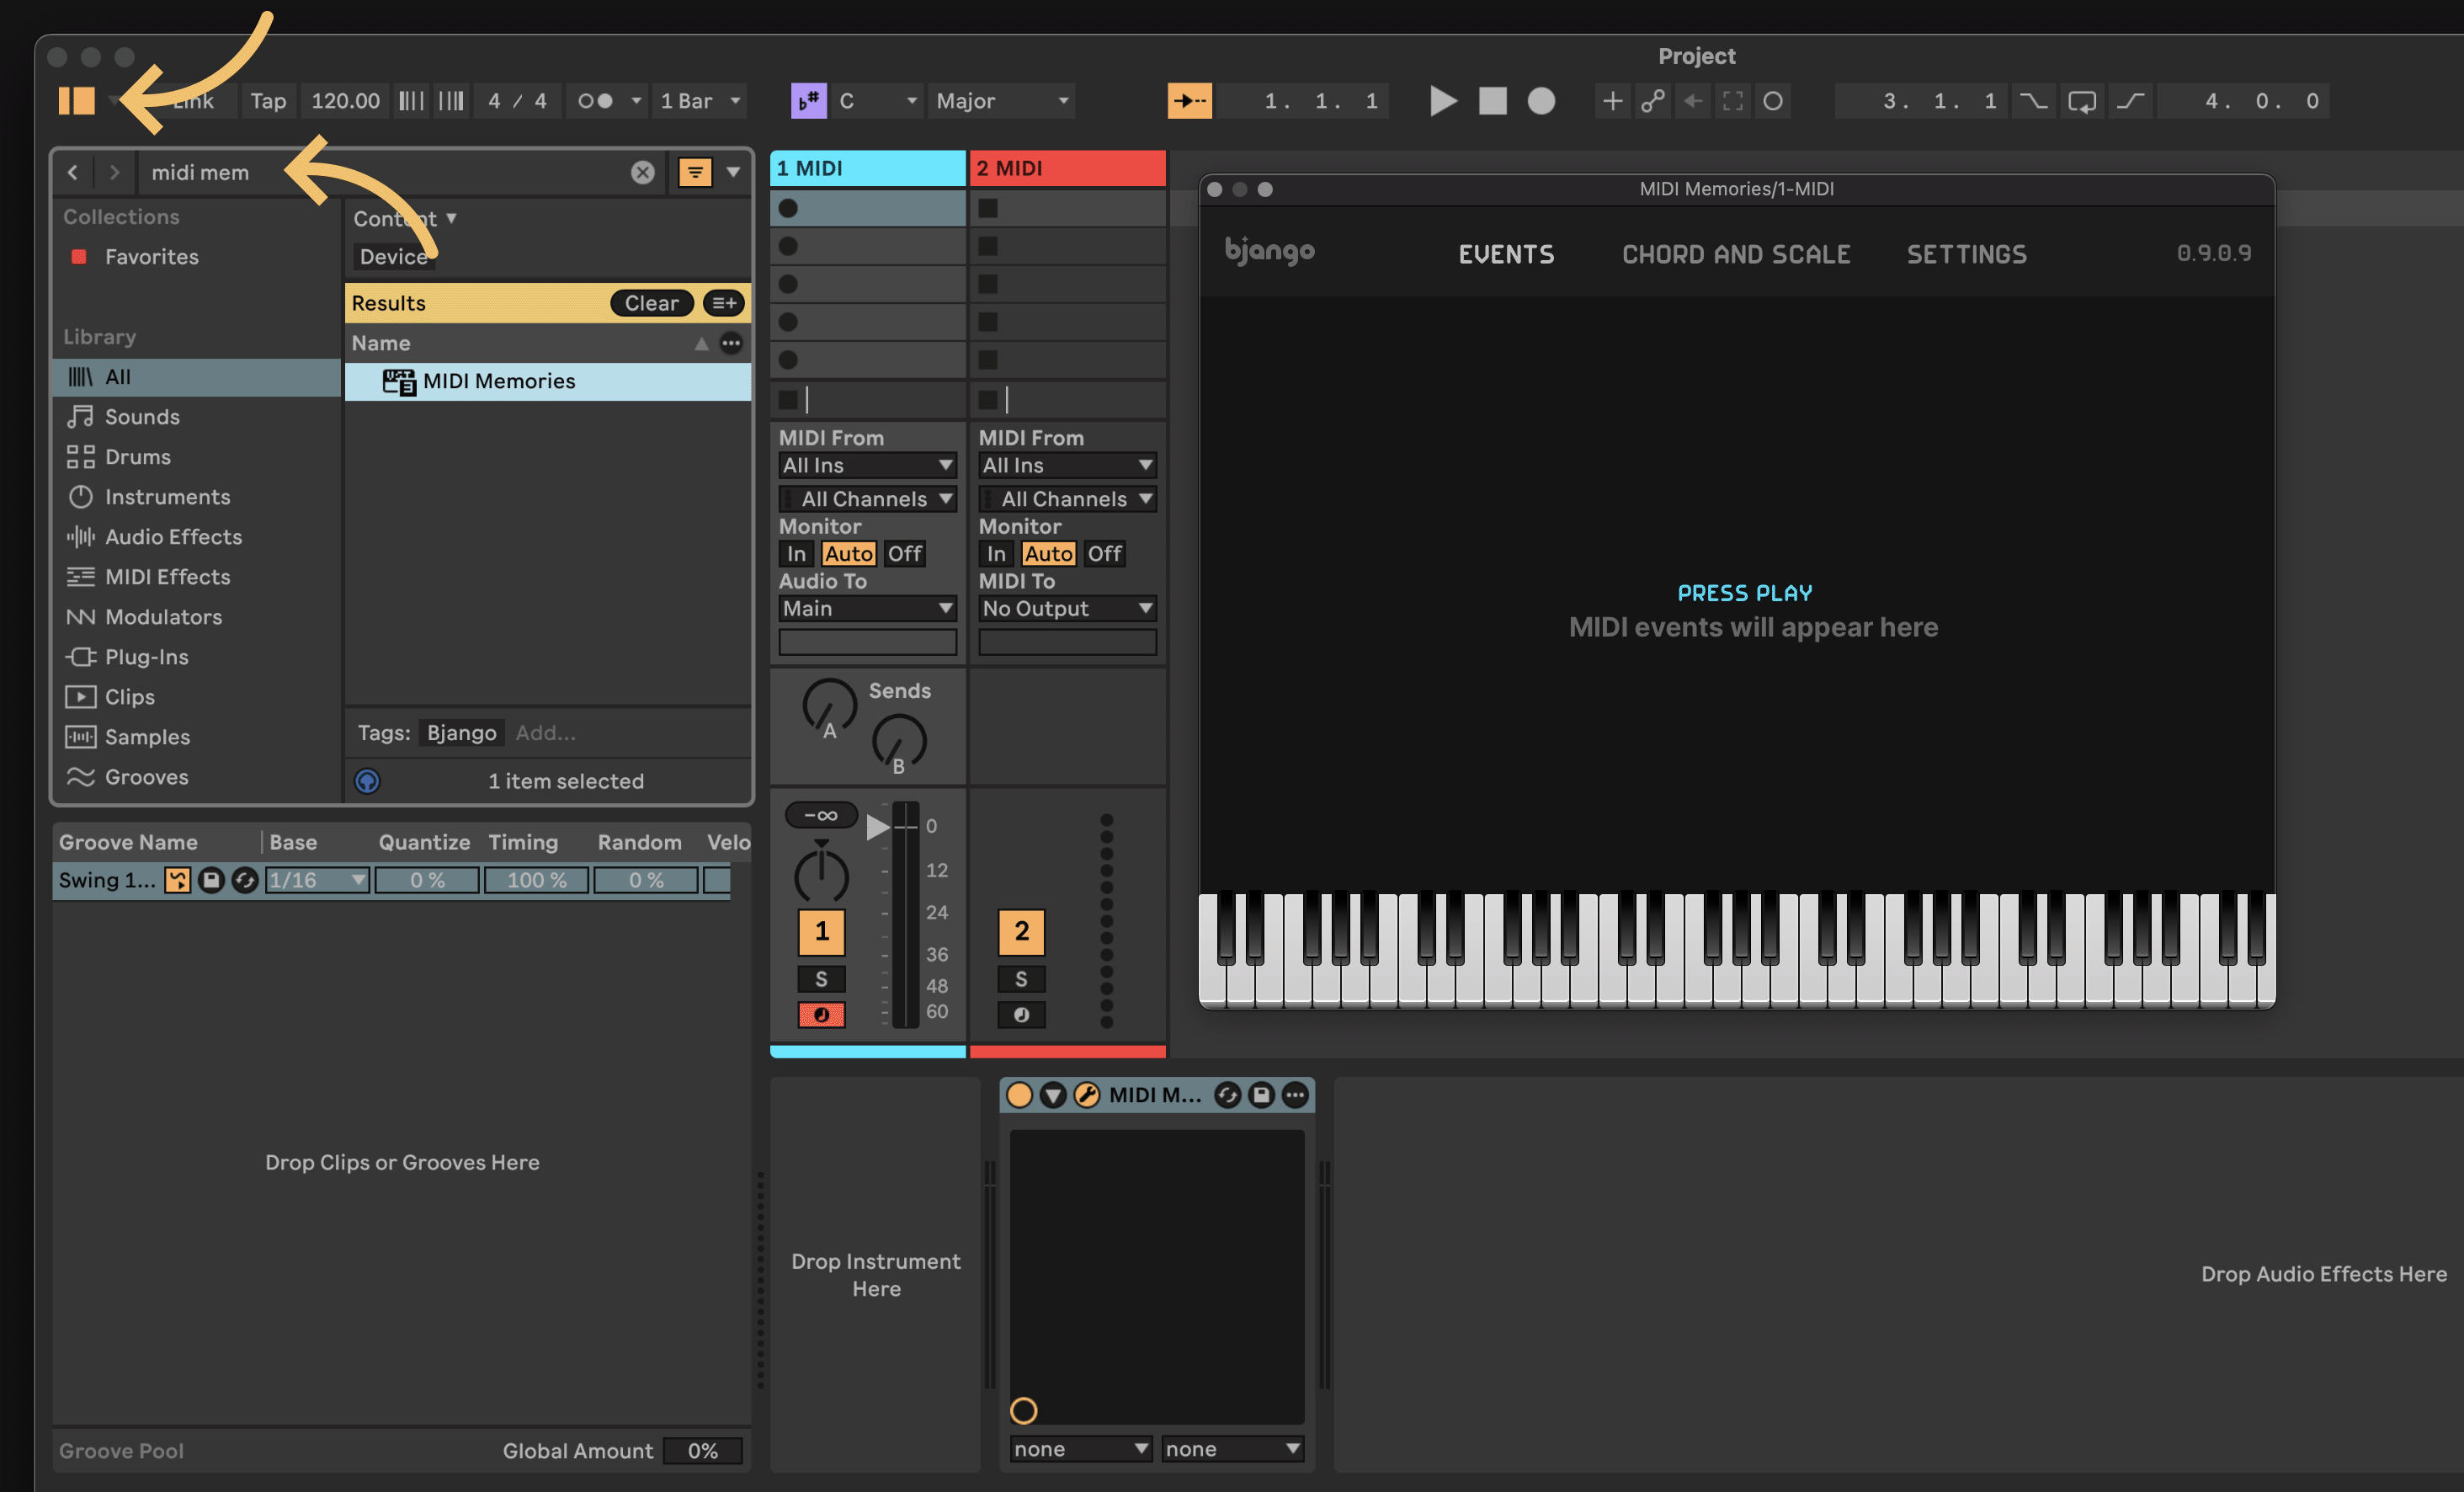
Select the first MIDI track, then open the browser by clicking the button at the top left of the window, and search for MIDI Memories. Double click MIDI Memories in the search results to add it to the track.
3. Add an instrument #
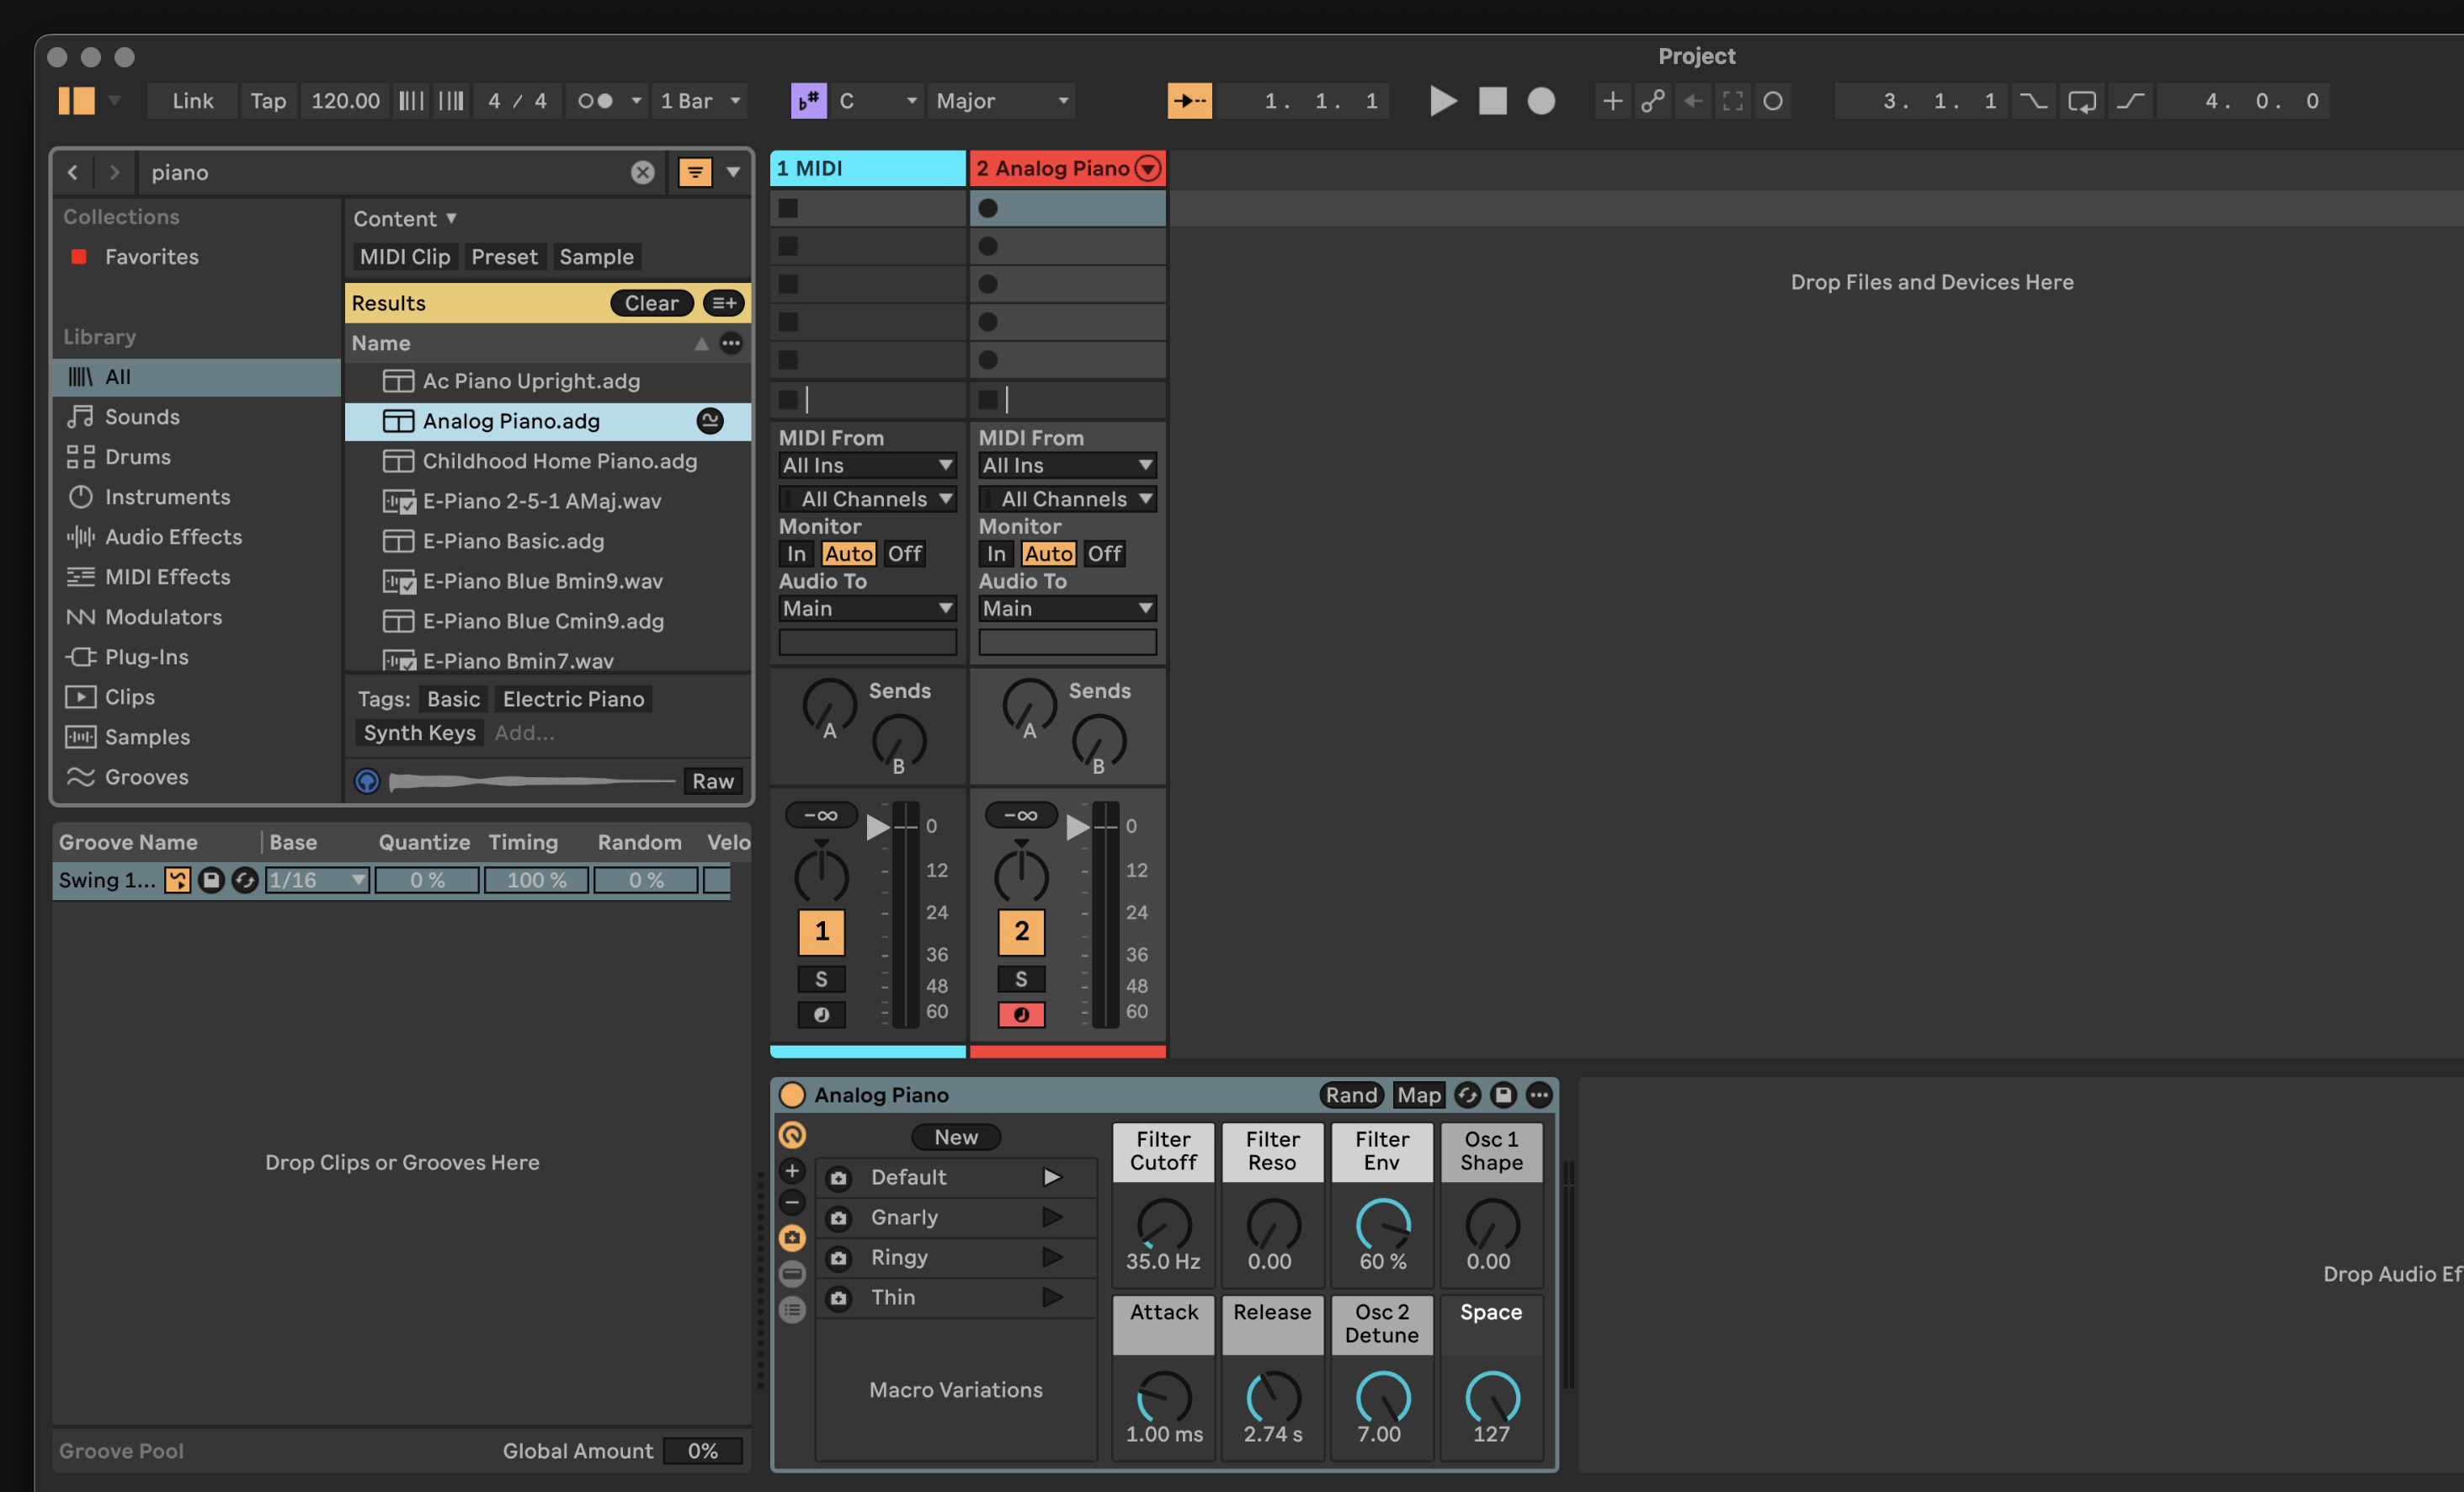
Select the second MIDI track, then add an instrument. This can be done in the same way as the previous step — search by typing an instrument name into the search field and then double clicking the name of the instrument to add it to the track.
4. Set up MIDI routing #
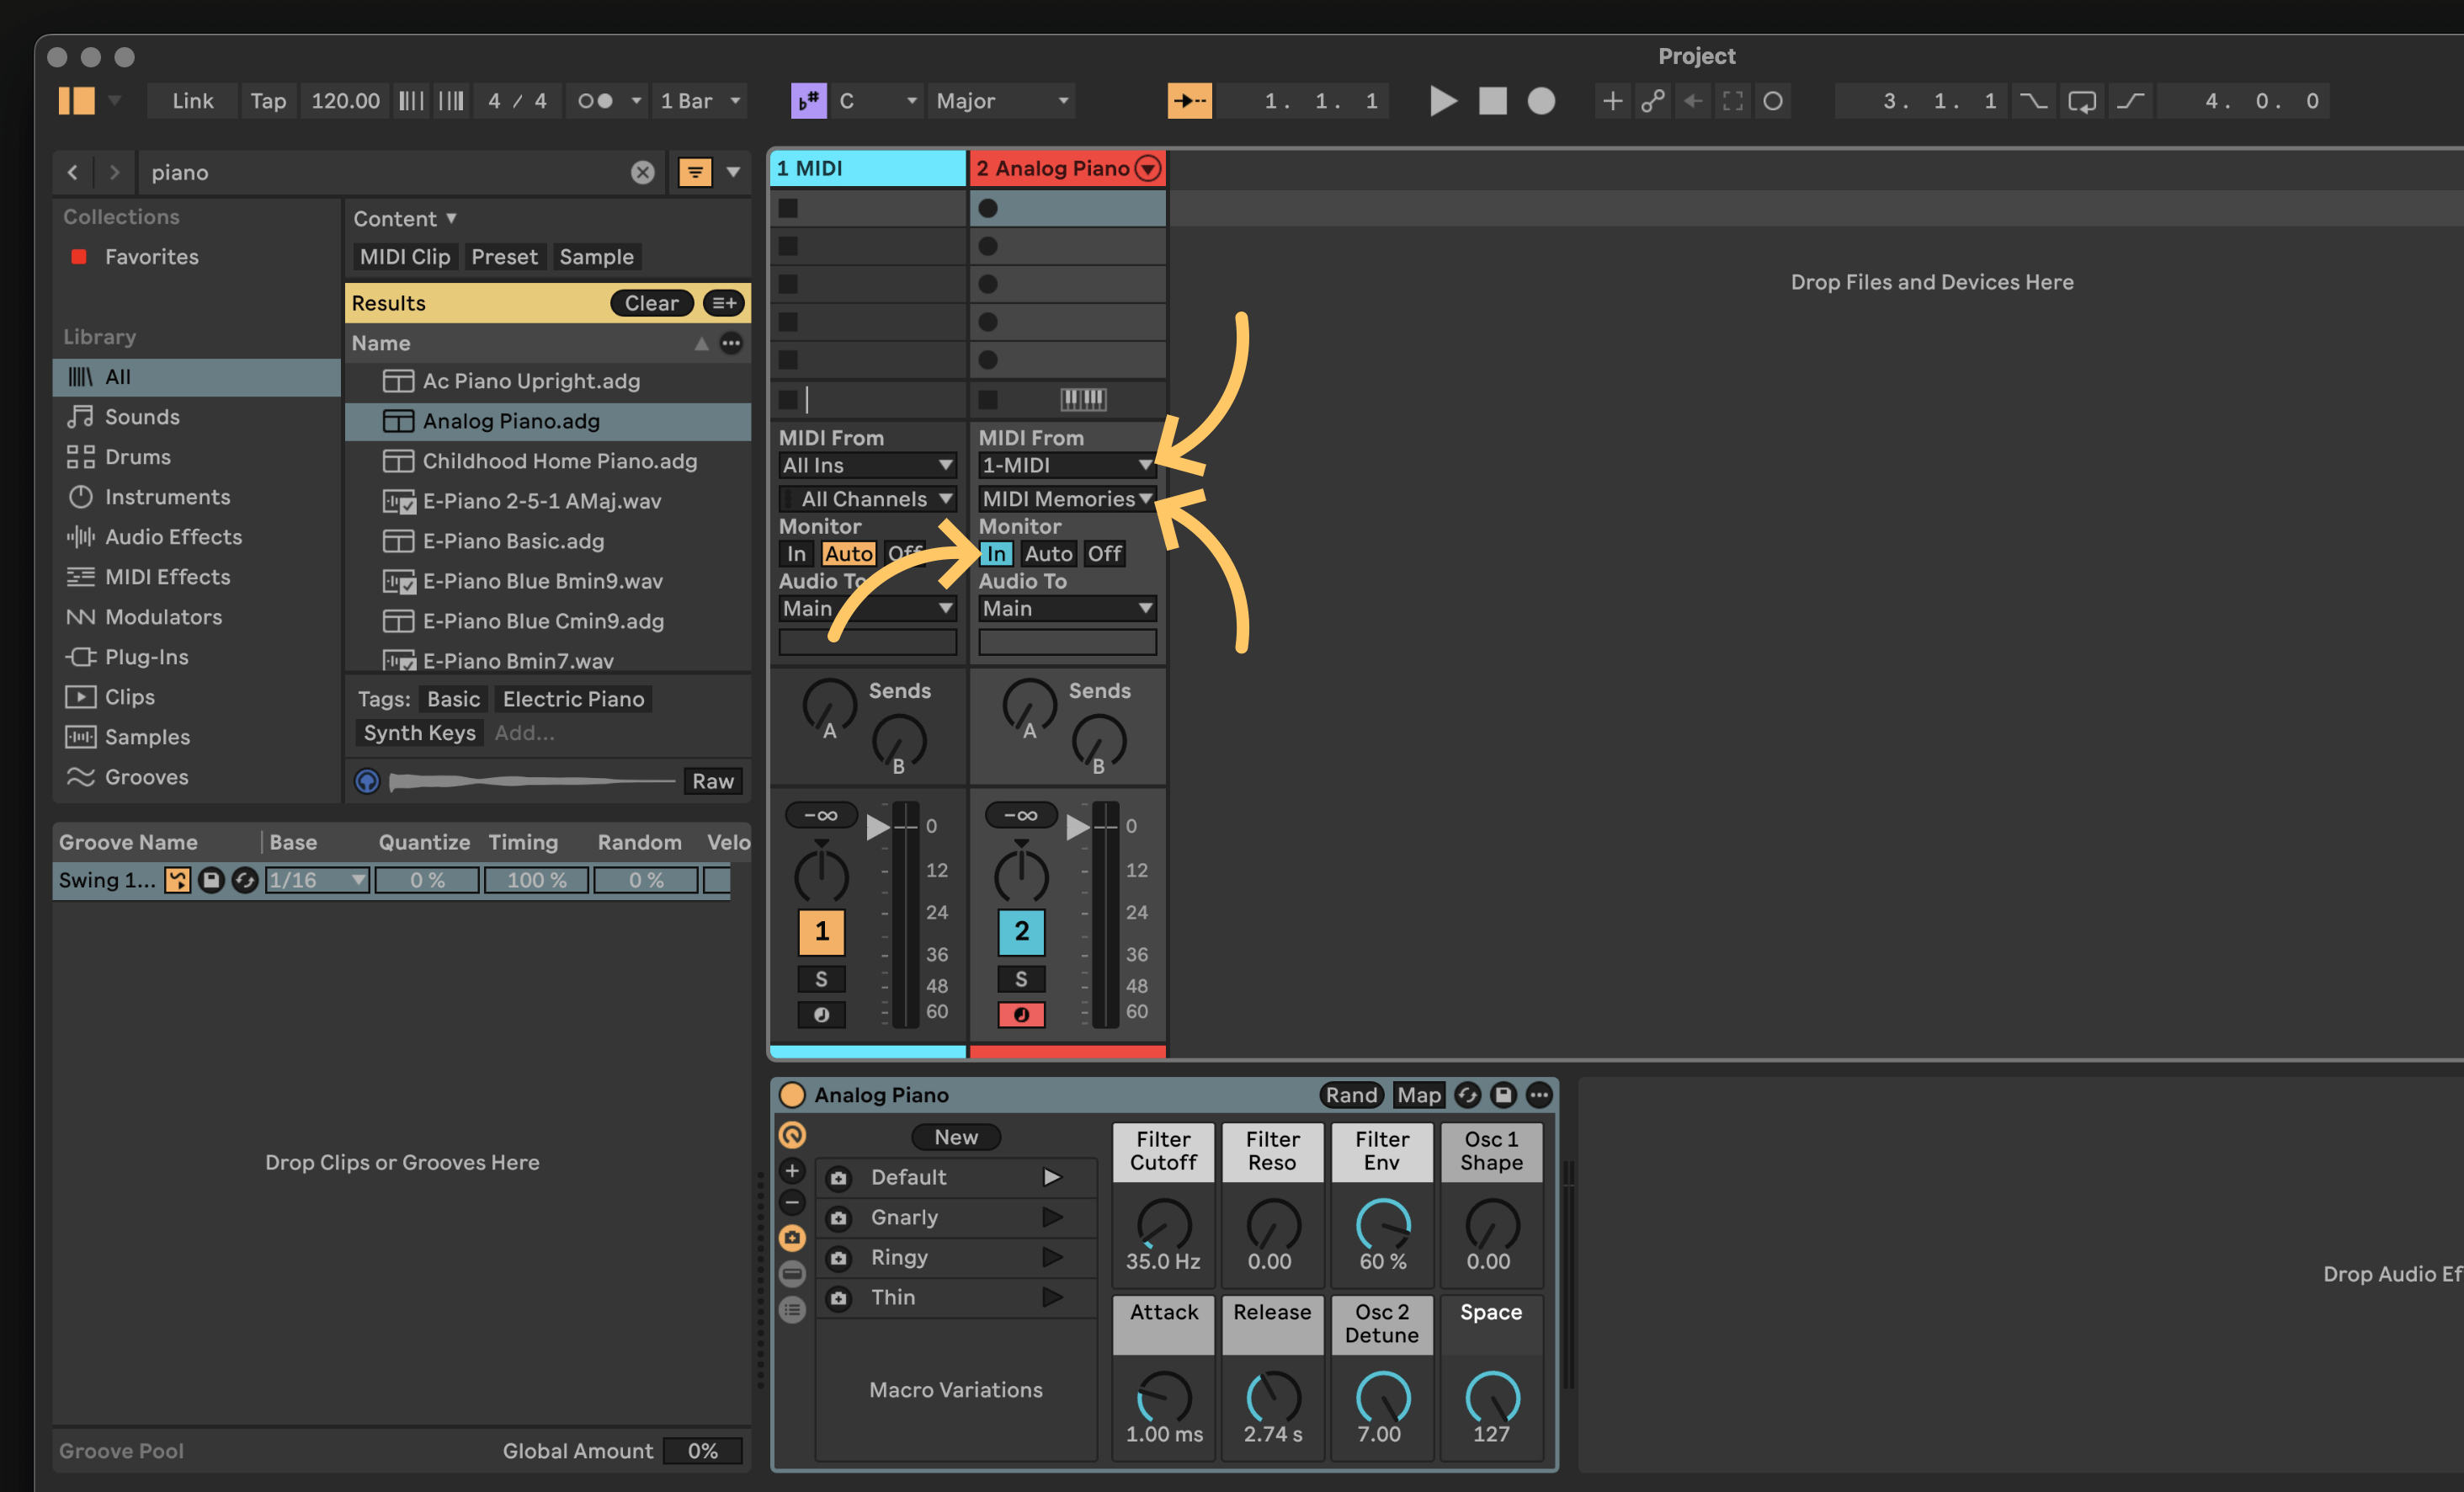
In the second MIDI track, set up the routing. There’s three steps:
- Change the first
MIDI fromitem to match the first MIDI track. - Change the second
MIDI fromitem to be MIDI Memories. - Change
Monitorto beIn.
You should now be able to play the instrument, modified by MIDI Memories, by placing MIDI regions on the first MIDI track (the one with MIDI Memories).
You’re all ready to go! Press play and MIDI Memories will record and display all events that pass through the plugin.