Using MIDI Memories with FL Studio
MIDI Memories is a MIDI effect. This means the setup is a bit different to normal audio effects plugins.
There’s a few different ways to use MIDI Memories in FL Studio, but the easiest is probably via the Patcher plugin.
1. Download the instrument version #
Some apps, like FL Studio, require MIDI effects plugins to be tagged as an instrument. We have a special version of MIDI Memories for apps with this requirement. Please download the instrument version below.
2. Add a the Patcher plugin #
In the Channel Rack, click + and add the Patcher plugin.
3. Add MIDI Memories and your instrument #
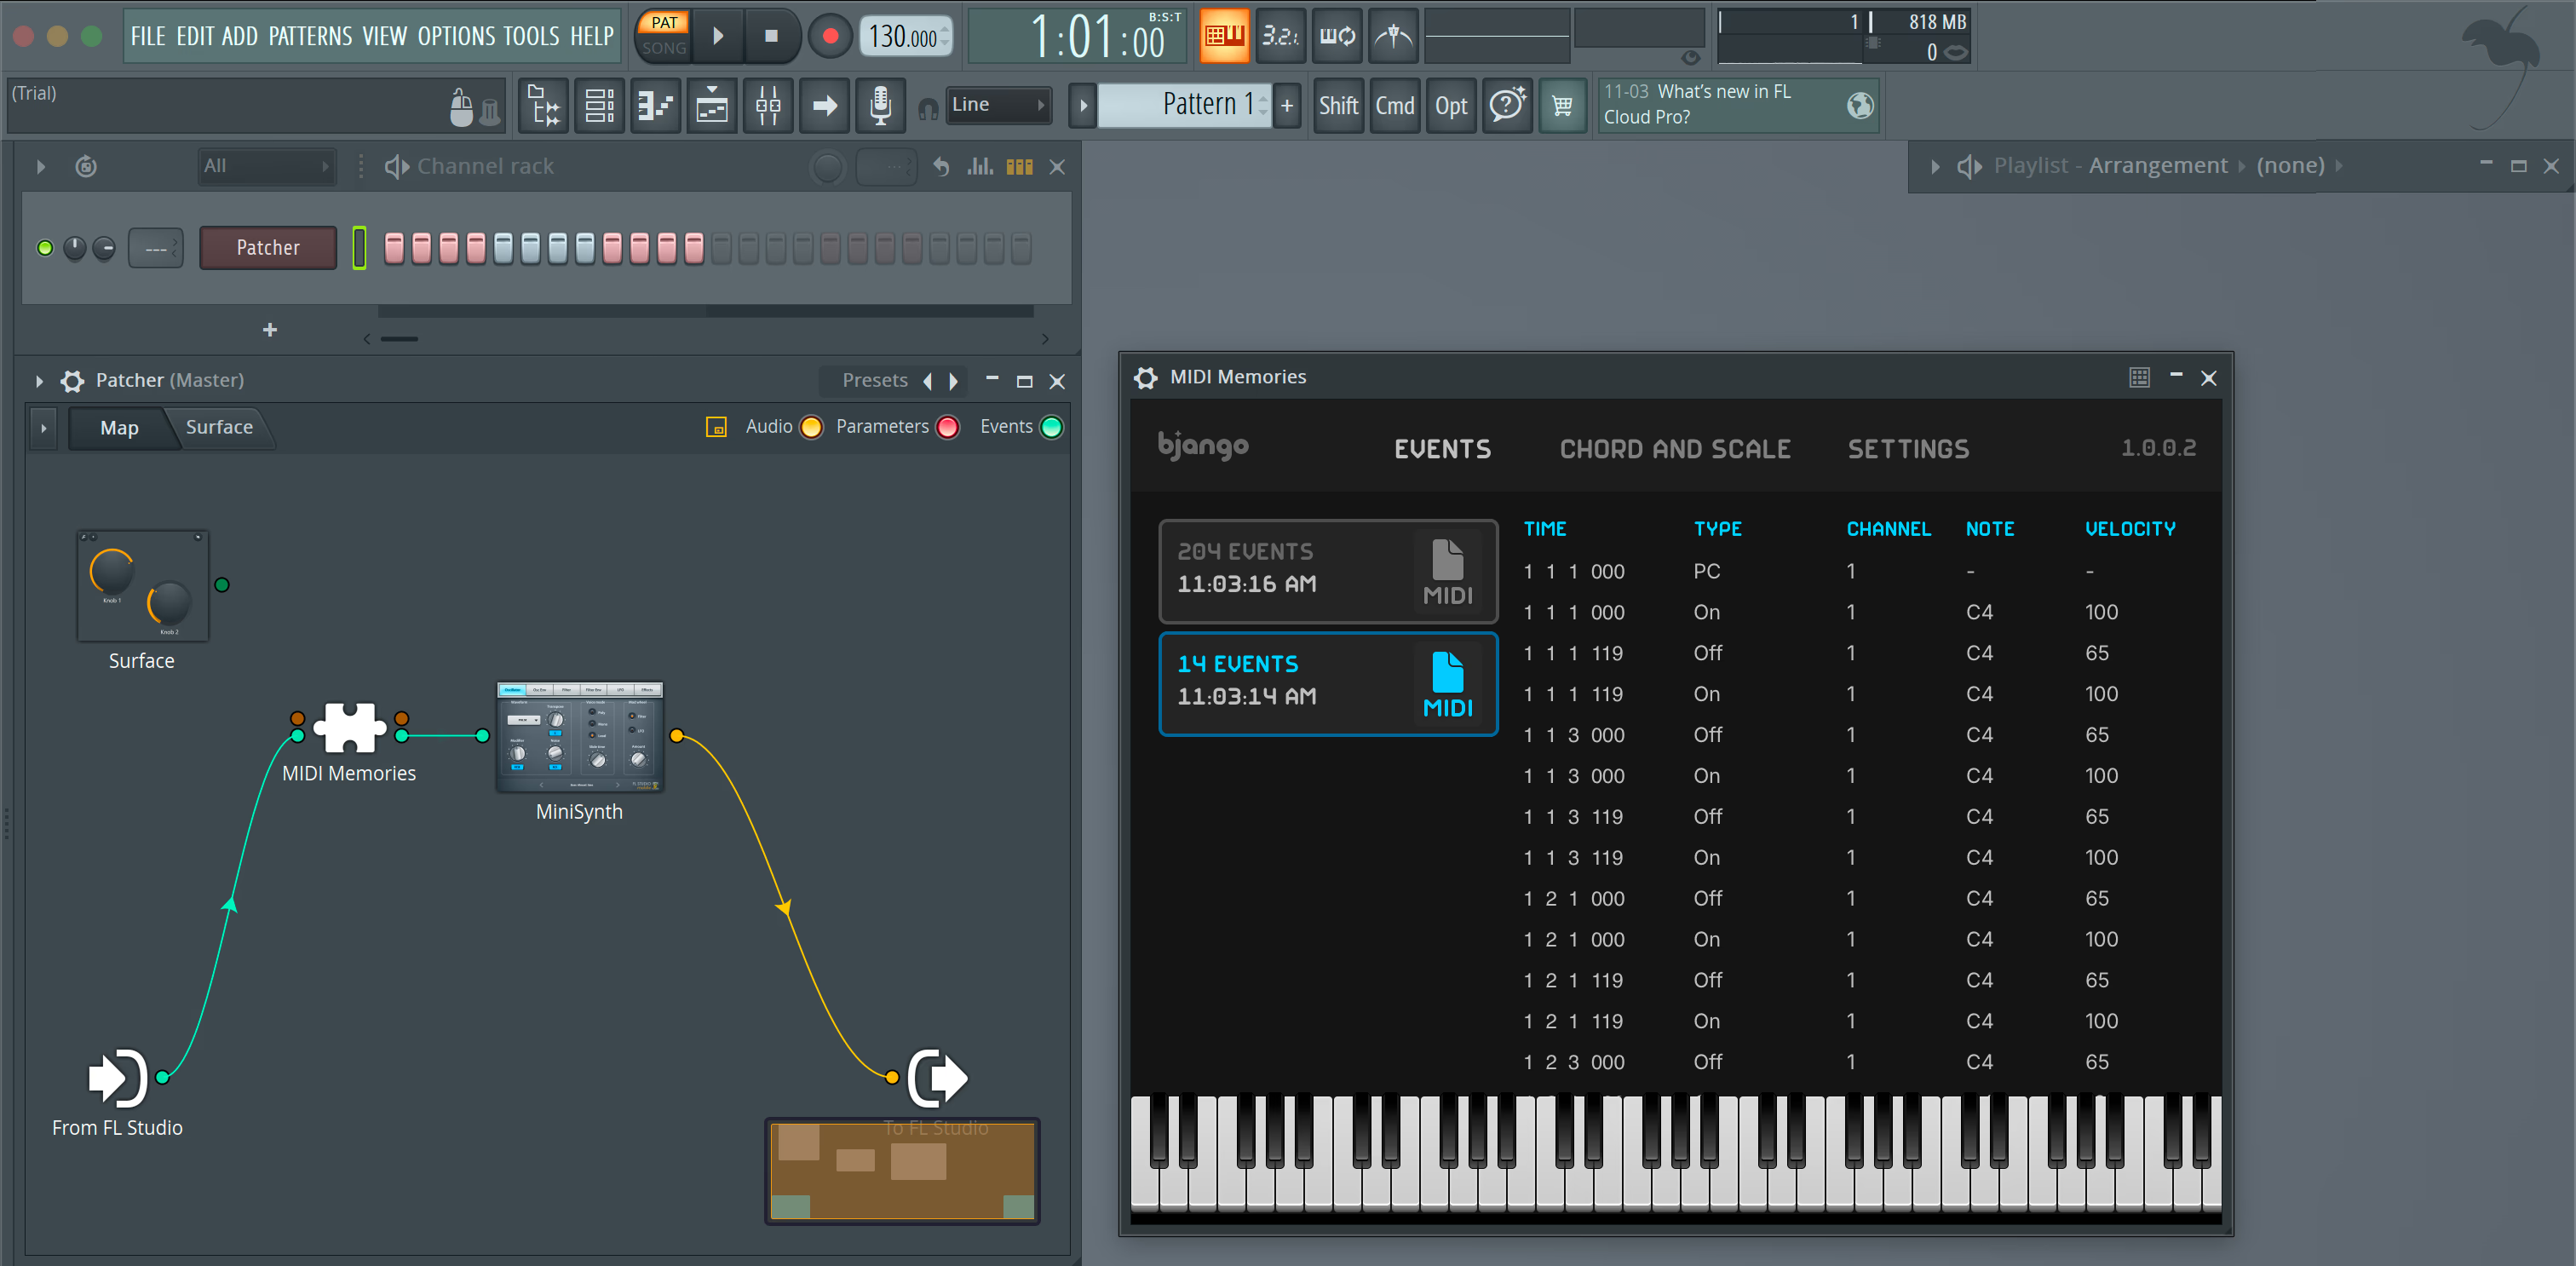
Inside the Patcher, right click and choose Add Plugin, and navigate to MIDI Memories. Then, right click and choose Add Plugin again, and add the instrument you’d like to use with MIDI Memories.
Drag the noodles so that the there’s lines connecting these items:
- A green line connecting
From FL Studioto the input ofMIDI Memories. - A green line connecting the output of
MIDI Memoriesto the input of your instrument. - An orange line connecting the output of your instrument to
To FL Studio.
Green lines represent MIDI data, and orange lines represent audio.
4. Edit the MIDI Memories settings #
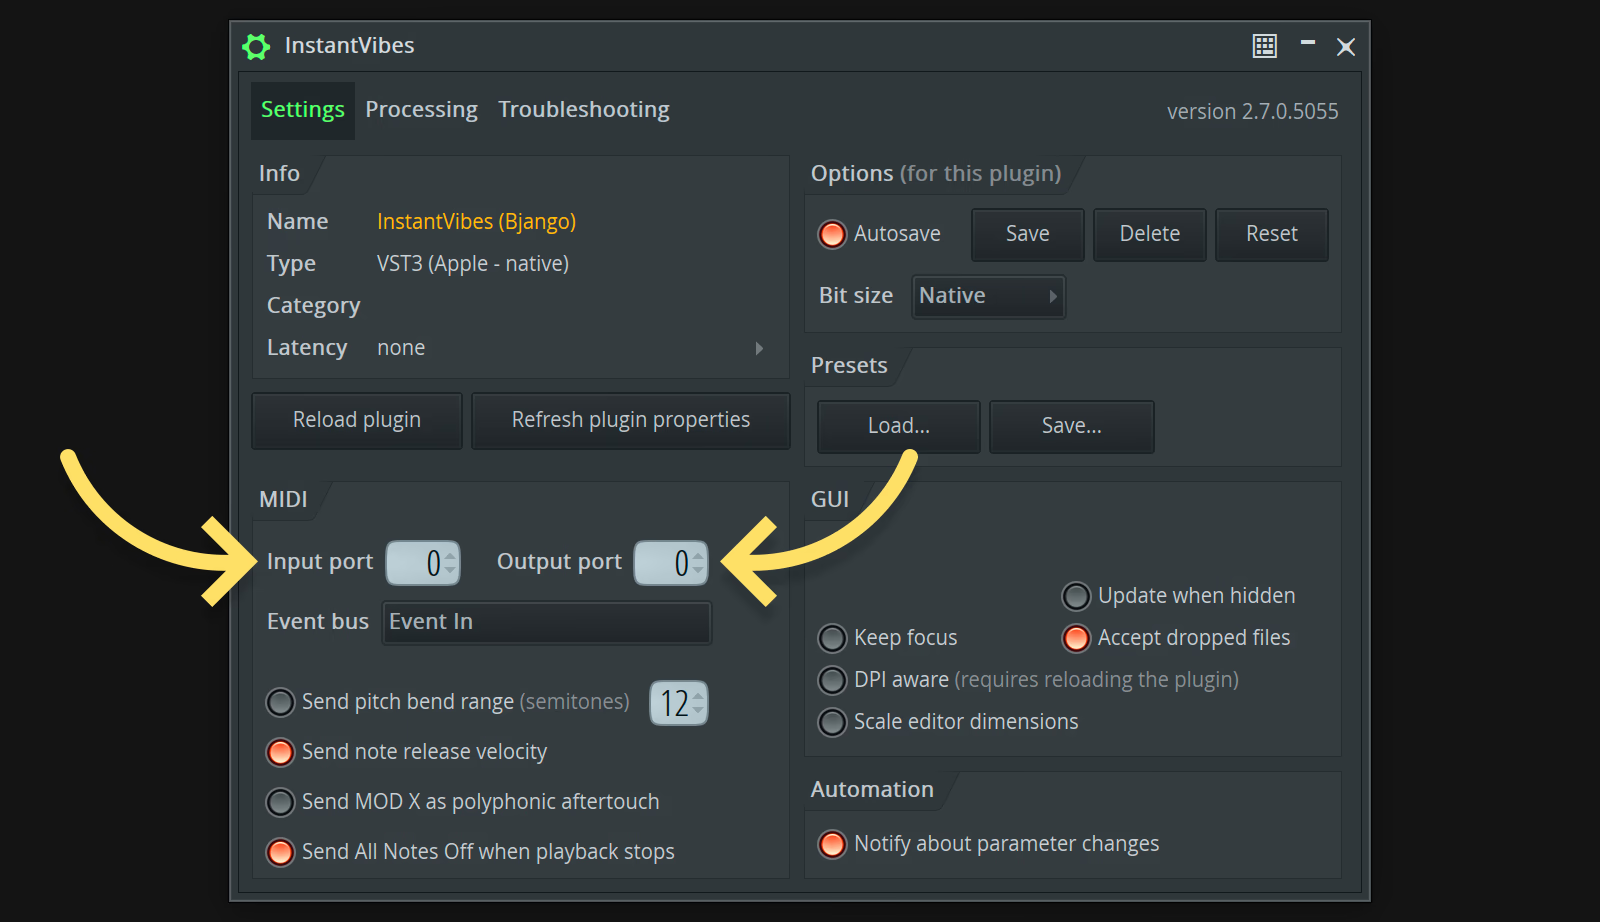
Go into the plugin settings and set an input MIDI channel and output MIDI channel. The instrument being used after MIDI Memories will need to respond to the same MIDI channel.
If MIDI Memories looks too big #
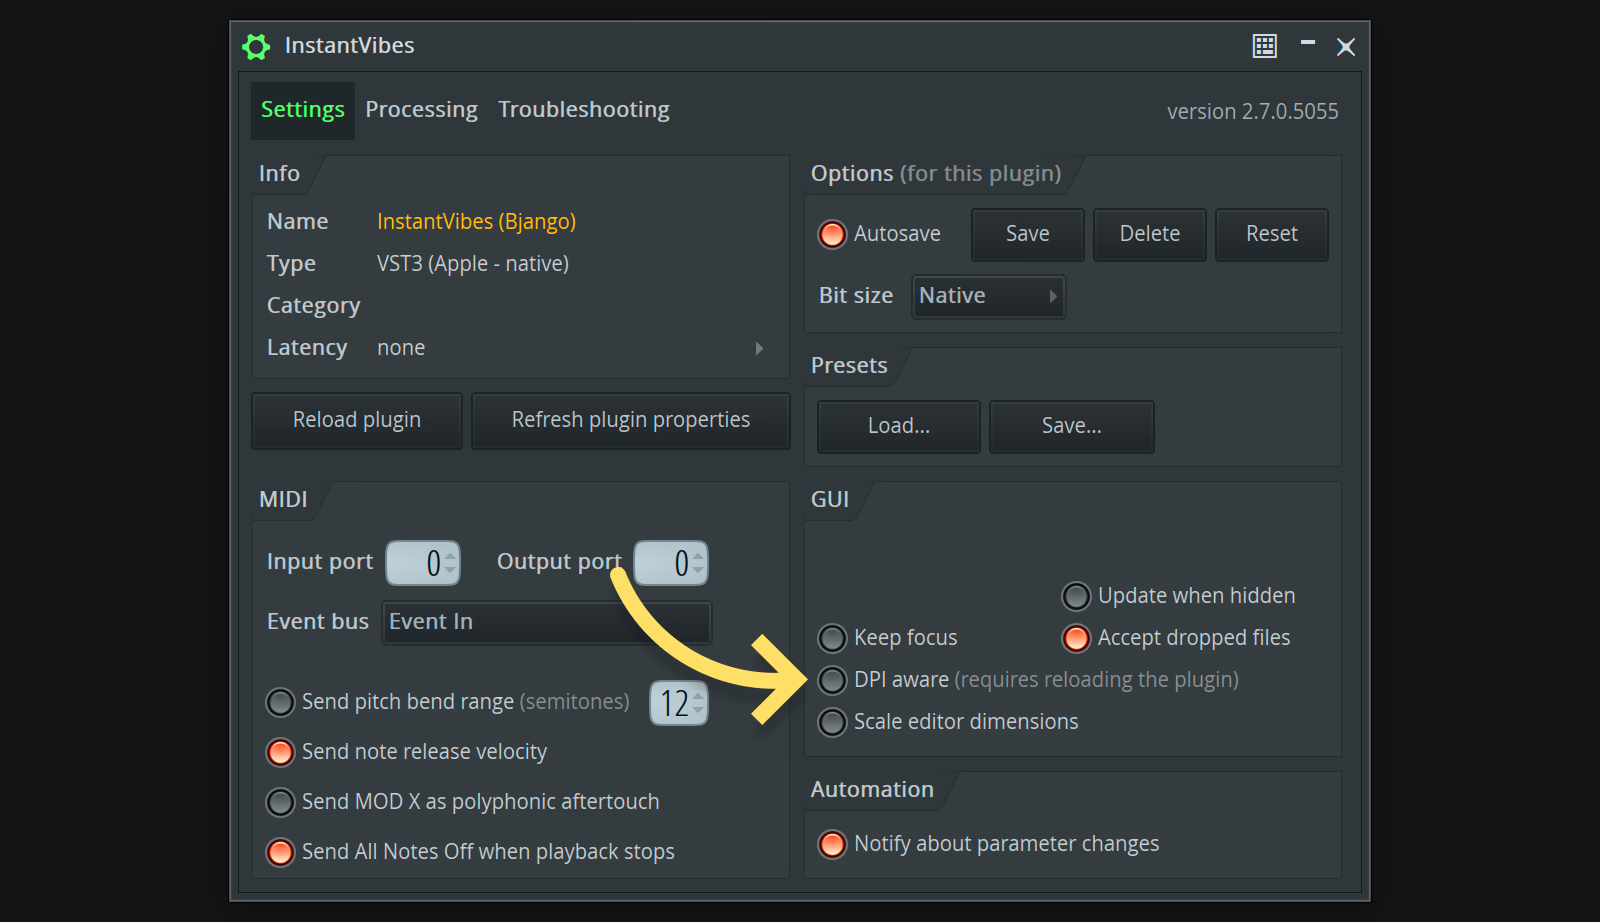
If the plugin window for MIDI Memories looks too big, please go into the plugin settings and uncheck DPI aware, then remove the plugin and re-add it.