Using Robot Rocket with FL Studio
Vocoders need two inputs to function — one that’s typically a voice (modulator), and another that’s typically a synth (carrier). Sound will only be produced when the voice and synth channels are playing something. Here’s the steps to get Robot Rocket set up.
1. Add a voice and synth track #
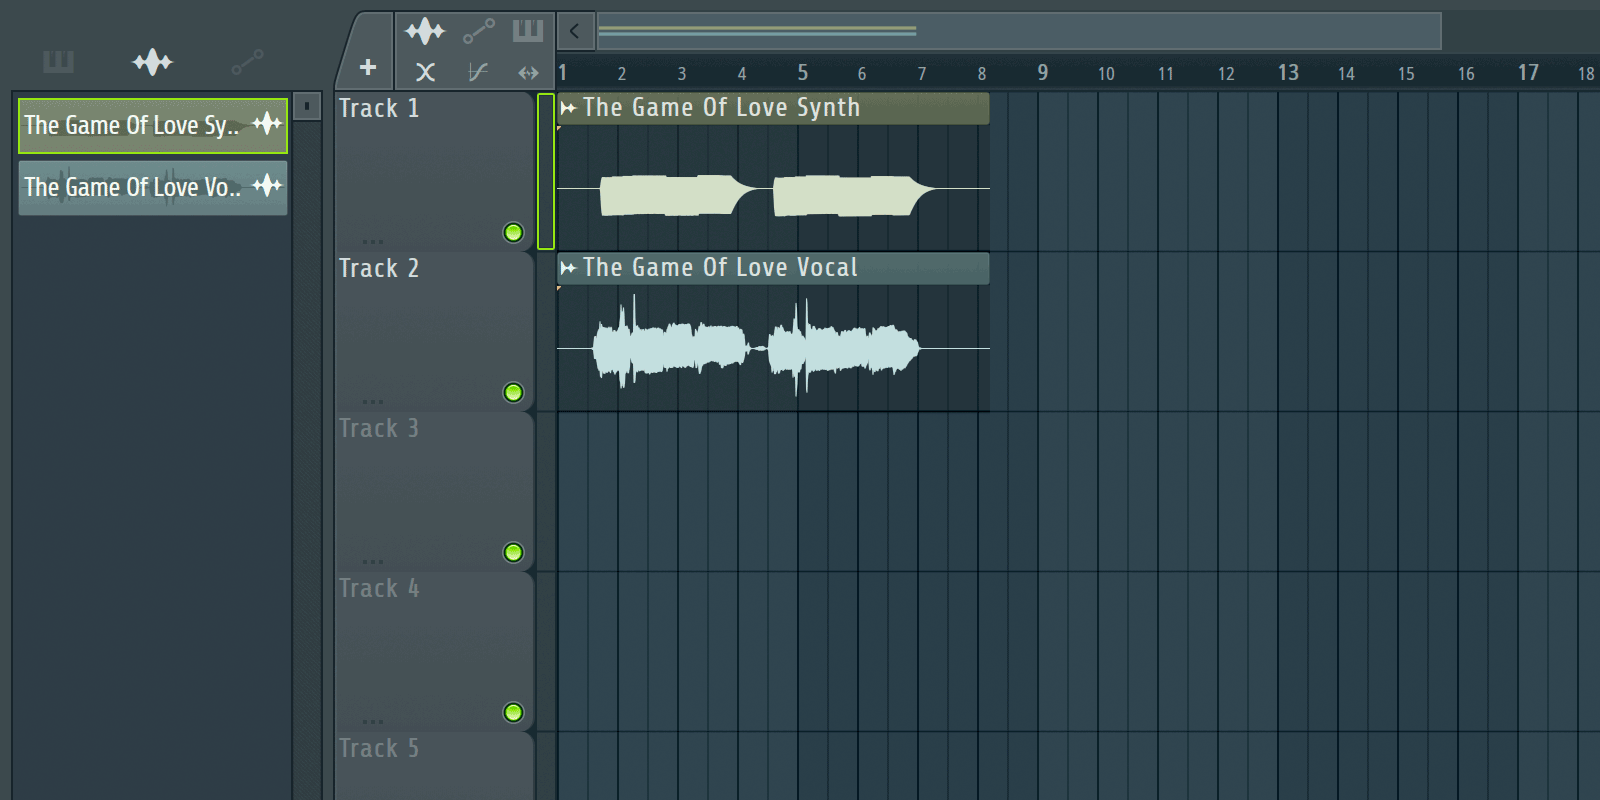
Start by adding a voice and synth track to your project. These can be audio you’ve recorded, or a live mic input and a software instrument, or really anything that makes sound. Our example project below has recorded audio for the voice and synth.
2. Assign channels to mixer tracks #
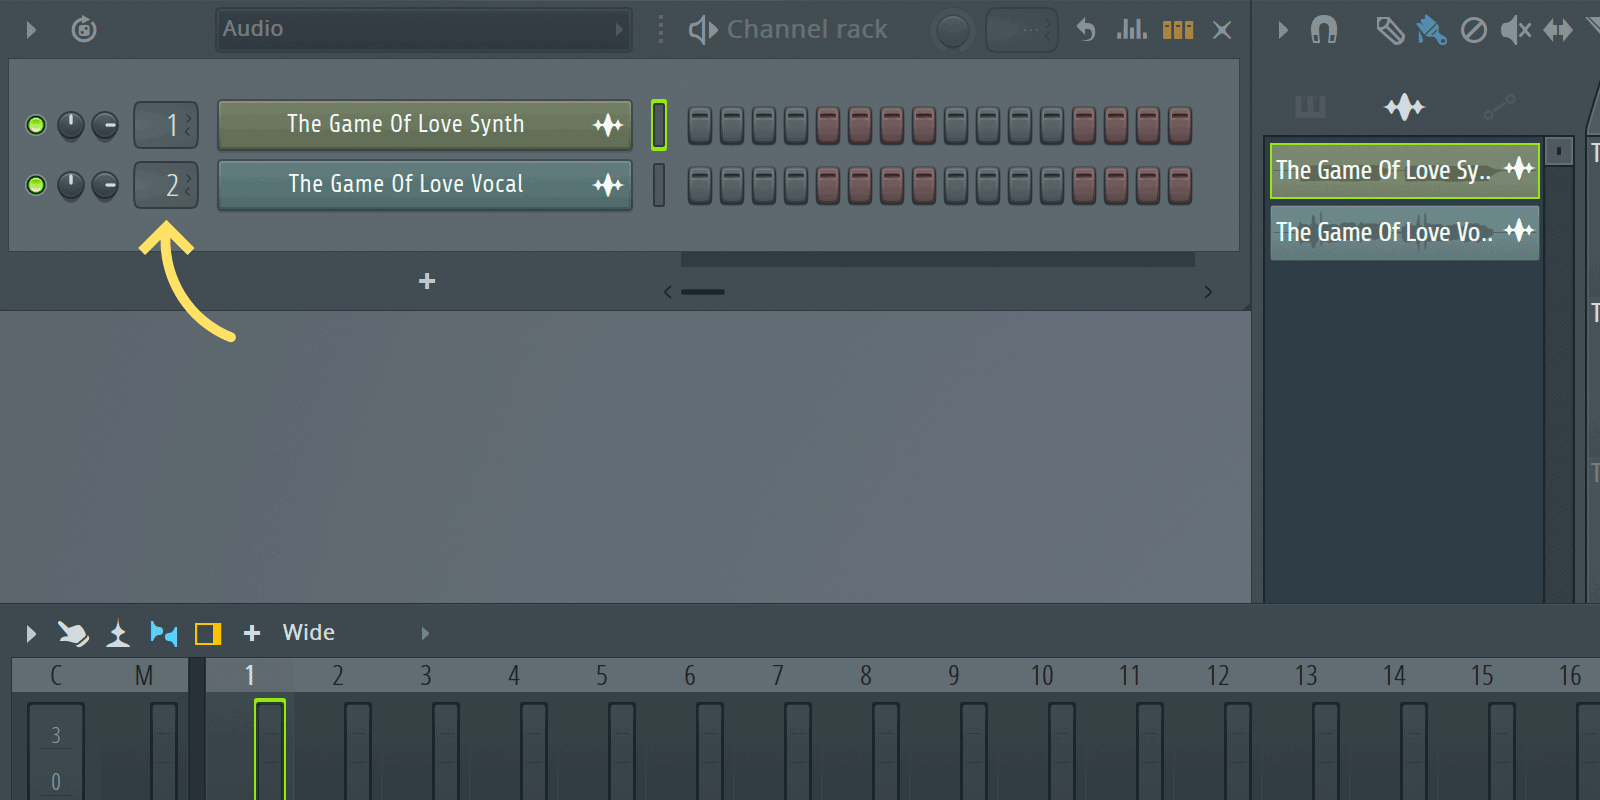
Assign the voice and synth channels in the channel rack to mixer tracks. We’re using mixer track 1 for the synth and mixer track 2 for the vocal.
3. Side chain the vocal to the synth #
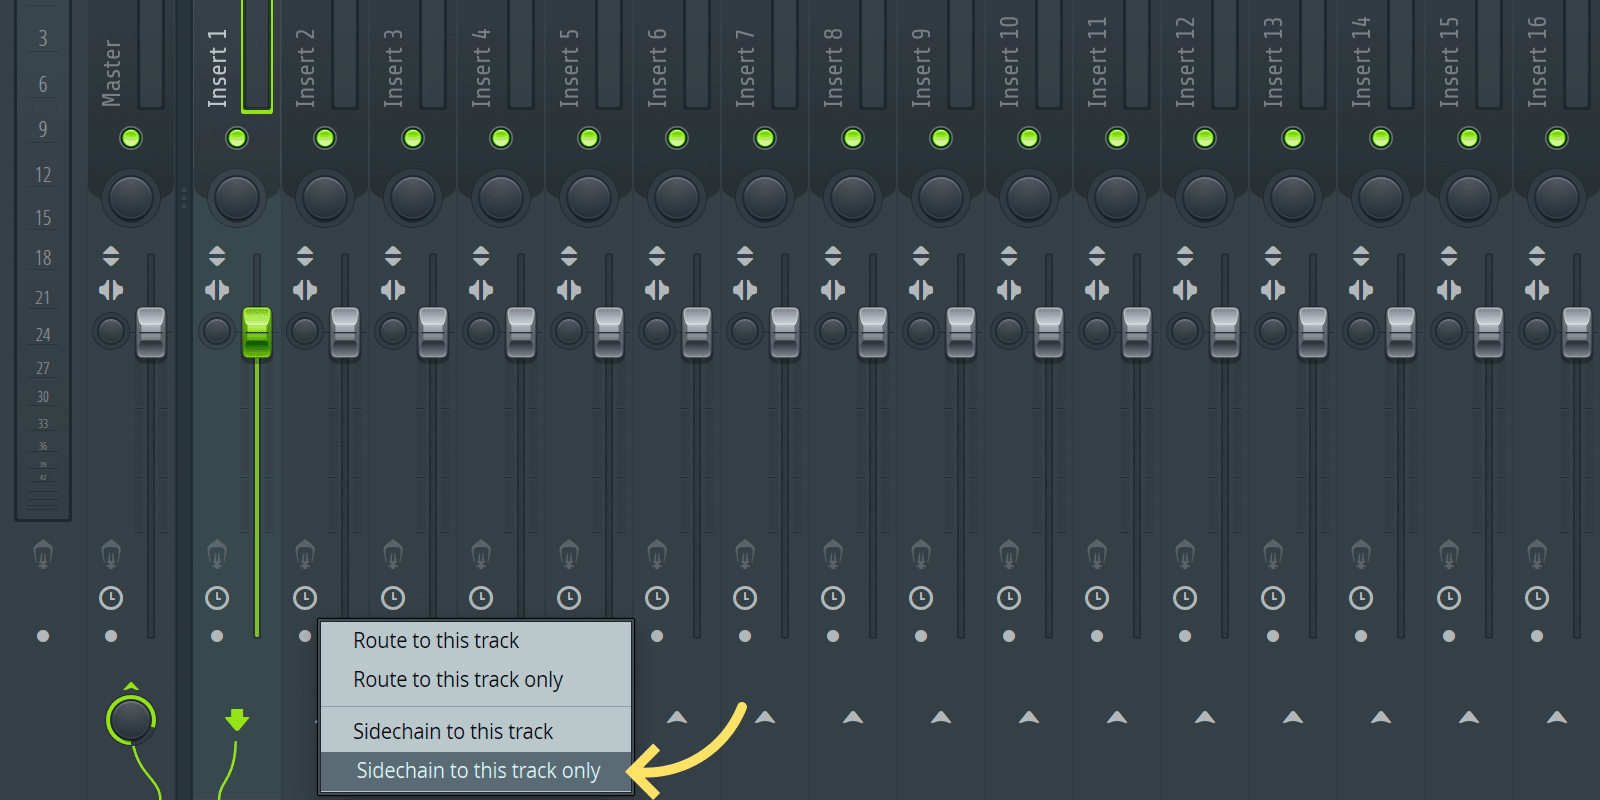
Select the synth track in the mixer, then right click the chevron on the bottom of the vocal track and choose sidechain to this track only. This will send the synth audio to the side chain input on the vocal track.
4. Add Robot Rocket to the vocal track #
In the mixer, add Robot Rocket into an effects slot on the vocal track.
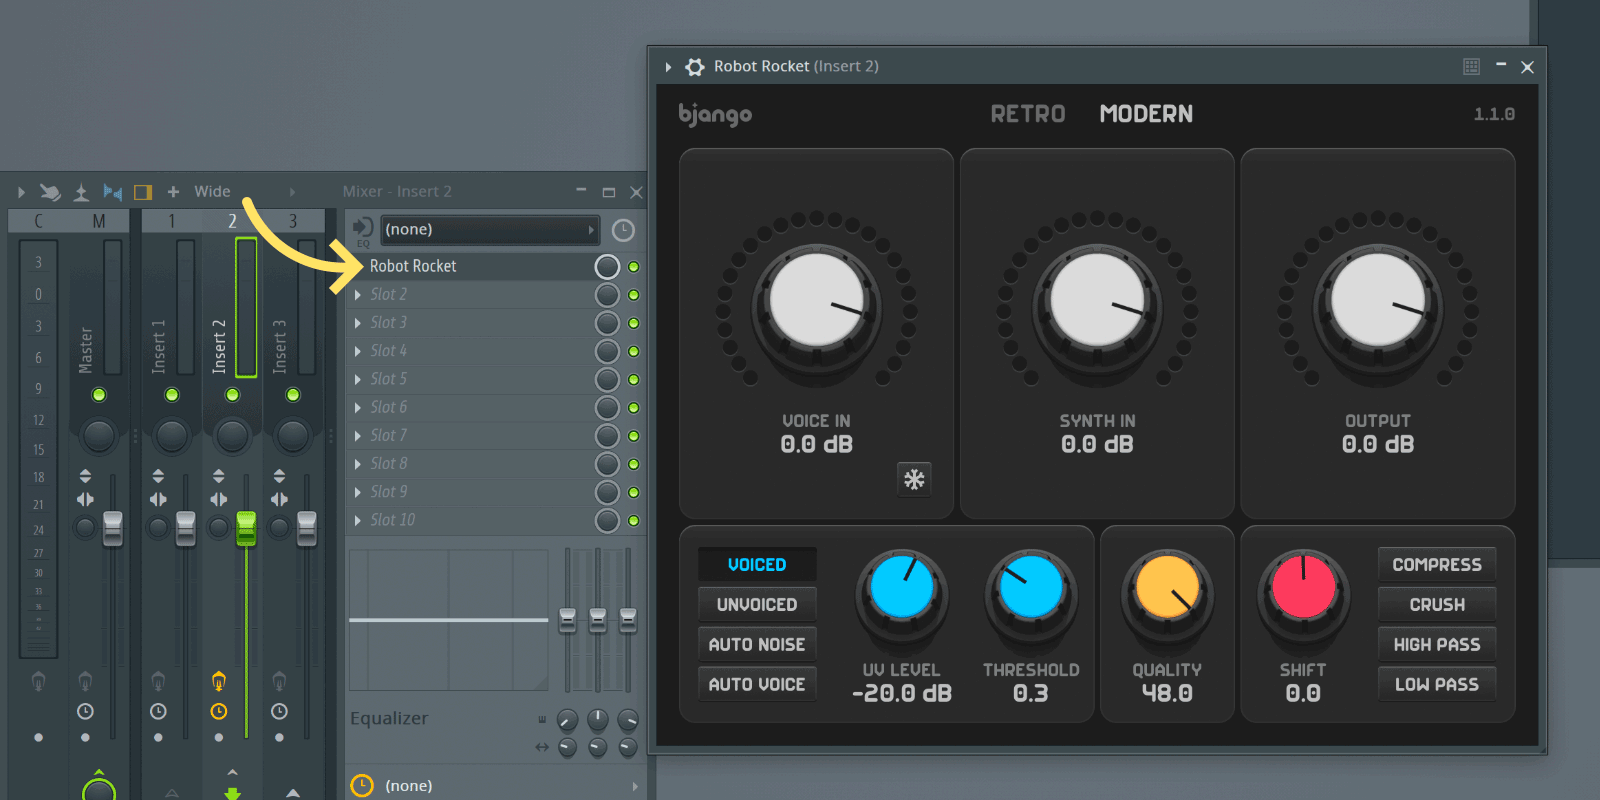
5. Set the second input for Robot Rocket #
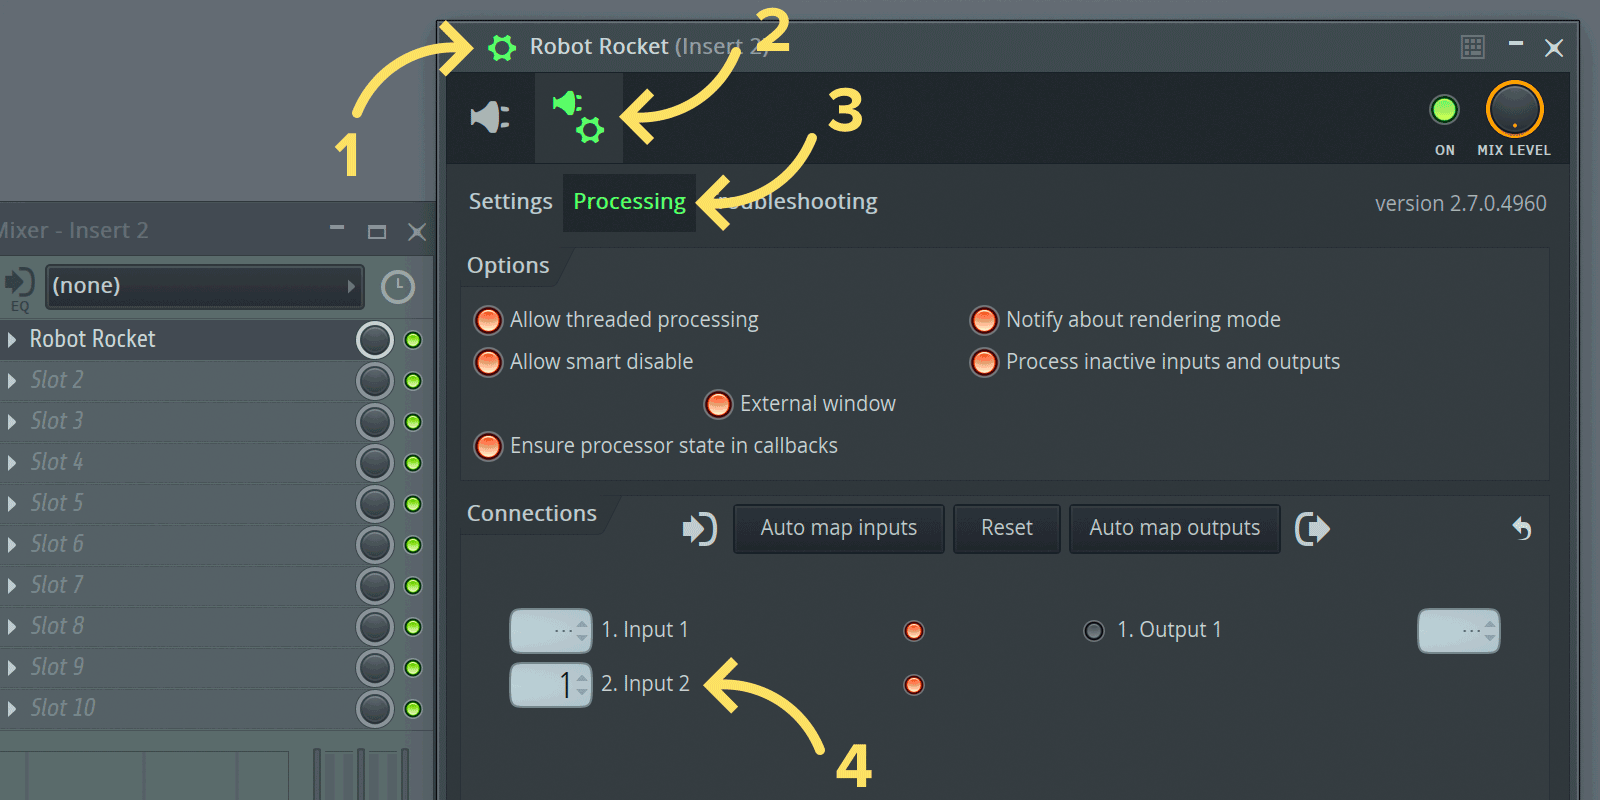
In the Robot Rocket plugin window, click the cog at the top left of the window, then click the second tab (the one with another cog), then click the processing tab.
In the connections section, set the correct mixer track as input 2. This should be the synth mixer track.