Using Robot Rocket with Reaper
Vocoders need two inputs to function — one that’s typically a voice (modulator), and another that’s typically a synth (carrier). Sound will only be produced when the voice and synth channels are playing something. Here’s the steps to get Robot Rocket set up.
1. Add a voice and synth track #
Start by adding a voice and synth track to your project. These can be audio you’ve recorded, or a live mic input and a software instrument, or really anything that makes sound. Our example project below has recorded audio for the voice and synth.

2. Add Robot Rocket to the voice track #
Find and add the Robot Rocket plugin to the voice track. To do this, click on the FX button, then search for Robot Rocket.

3. Set up the side chain #
Send the synth channel to Robot Rocket. The quickest way to do this is to open Robot Rocket, and drag from the send area on the synth channel to the plugin window.

4. Mute the synth #
Once the synth is set up with a sound you like, stop the synth track from sending to the master channel. This can be done by clicking on the routing button, then unchecking Master send channels from/to. The final vocoded result will be heard via the voice track, so the synth track’s output doesn’t need to be heard. A basic sawtooth synth with the filter open is a good starting sound source for a vocoder.

You should now be able to hear a vocoded sound after pressing play. Please note that Robot Rocket will not produce any sound unless the side chain is set up and both channels are playing audio.
Dragging dials #
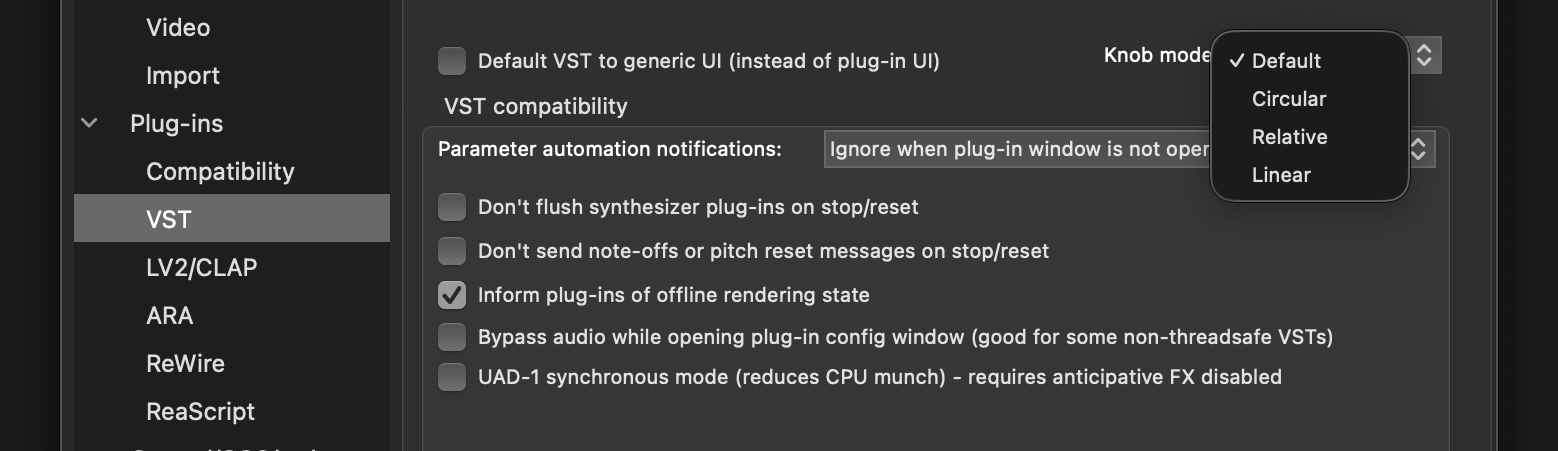
The behaviour when dragging the dials in Robot Rocket and other VST plugins can be changed via Preferences › Plug-ins › VST › Knob mode. Linear will increase and decrease as the cursor is dragged up and down respectively. Default points the dial towards the mouse cursor. Please note that you’ll need to click Apply or close the preferences window for the change to take effect.